Add the printer you are setting up. The following steps are based on Mac OS X 10.8. Depending on the OS version, the menu and steps may differ.
If your printer has already been displayed as "EPSON XX-XXXX AirPrint", select the printer, and then click [-] to delete.
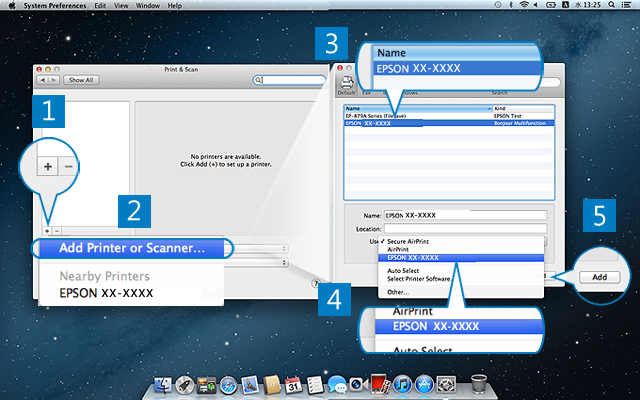
Click [+], and then select [Add Printer or Scanner].Do not select a printer displayed on this menu. By selecting the printer adding menu, you can select the Epson printer driver.
Select the printer you want to register from the list.Confirm the printer connection type from [Kind], and then select the printer.
Click [Use], and then select "EPSON XX-XXXX".To use all functions of the printer, select Epson printer driver. If you select "Secure AirPrint" or "AirPrint", you can only use the basic functions of the printer.
Click [Add].
Confirm the printer is registered, and then close the screen.